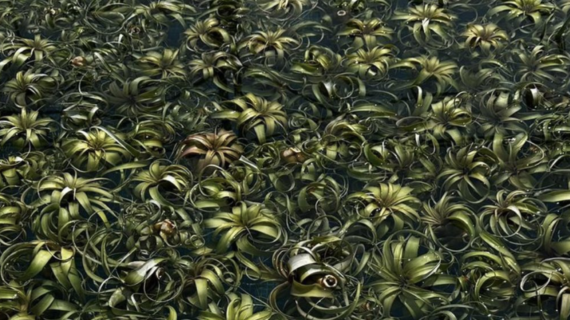
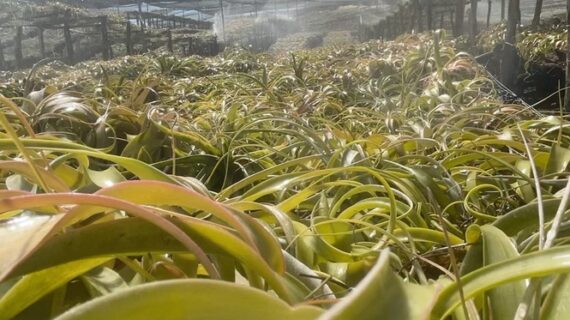
How to Water Your Air Plant


Facebook


Instagram


Linkedin


Envelope

Xerographica wet air plant

Air plants, scientifically known as Tillandsias, have gained popularity as low-maintenance and unique houseplants. These intriguing plants don’t require soil to grow, but they do need water to thrive. In this informative blog post, we will delve into the art of watering air plants, providing you with essential tips and techniques to ensure your Tillandsias stay healthy and vibrant.

Understanding Air Plant Watering Needs

Air plants are adapted to draw water and nutrients from the air through specialized trichomes on their leaves. They are drought-tolerant and can withstand periods of limited moisture. However, they still need water to survive and thrive.

1. The Soaking Method

  • Submerge your air plant in a bowl of room-temperature water.
  • Allow it to soak for about 20-30 minutes.
  • Gently shake off excess water after soaking.
  • Place the plant upside down to ensure that water doesn’t collect at its base, as this can lead to rot.

2. The Misting Method

  • Using a spray bottle, mist your air plant thoroughly.
  • Be sure to spray it until the leaves are visibly wet.
  • Repeat misting about 2-3 times a week, depending on the humidity in your environment.

3. The Dunking Method

  • Fill a container with water and submerge your air plant.
  • Hold it underwater for a few seconds, allowing it to absorb moisture.
  • Shake off excess water and let it dry upside down.

Frequency of Watering

The frequency of watering depends on several factors, including your local climate, the indoor humidity, and the specific needs of your air plant. As a general guideline, here’s what to consider:

  • In a dry climate: Water your air plant every 1-2 weeks.
  • In a humid environment: Watering once a month may suffice.
  • Pay attention to your plant’s appearance. If it looks overly dry or excessively wet, adjust your watering accordingly.

Air Plants World Misting

Water Quality

It’s important to use clean, filtered, or dechlorinated water when watering air plants. Avoid using hard water, which can leave mineral deposits on the leaves. You can use rainwater or water that has been left out in an open container for at least 24 hours to allow the chlorine to dissipate.

Drying After Watering

After watering your air plant, ensure it dries completely within 4 hours. Water left on the leaves for an extended period can lead to rot. Place your air plant upside down or in a well-ventilated area to aid in the drying process.

Watering air plants is a simple yet essential aspect of their care. By understanding their unique needs and applying the right watering method and schedule, you can enjoy these captivating and adaptable plants in your living space. Remember that a little care goes a long way in ensuring the health and longevity of your air plants.

Join us on Instagram and Facebook

.cls-1{fill:url(#linear-gradient);}.cls-2{fill:#f7e994;}.cls-3{fill:#f7e281;}.cls-4{fill:#f8ea97;}.cls-5{fill:#69654e;}.cls-6{fill:#685d34;}.cls-7{fill:#ecbd4b;}.cls-8{fill:#eaa747;}.cls-9{fill:#f78e80;}.cls-10{fill:#e9d946;}.cls-11{fill:#e2e6e5;}.cls-12{fill:#e9a646;}.cls-13{fill:#e68f83;}.cls-14{fill:#807380;}.cls-15{fill:#80716d;}.cls-16{fill:#807467;}.cls-17{fill:#808580;}.cls-18{fill:#7f8067;}.cls-19{fill:#97716d;}.cls-20{fill:#98716d;}.cls-21{fill:#806161;}.cls-22{fill:#7f8366;}.cls-23{fill:#8b72b3;}.cls-24{fill:#9ca58f;}.cls-25{fill:#9faba0;}.cls-26{fill:#a0aca1;}.cls-27{fill:#a0b1a5;}.cls-28{fill:#a0aa9f;}.cls-29{fill:#9eaba0;}.cls-30{fill:#a0b09c;}.cls-31{fill:#b9a584;}.cls-32{fill:#b9978c;}.cls-33{fill:#8c72b3;}.cls-34{fill:#8d7a74;}.cls-35{fill:#b9b5ac;}.cls-36{fill:#8c9b80;}.cls-37{fill:#c37a74;}.cls-38{fill:#b69a8f;}.cls-39{fill:#b69a8e;}.cls-40{fill:#ba978b;}.cls-41{fill:#b8988d;}.cls-42{fill:#cfa359;}.cls-43{fill:#ce887d;}.cls-44{fill:#d0807c;}.cls-45{fill:#ac6e63;}.cls-46{fill:#b3a68a;}.cls-47{fill:#b3a346;}.cls-48{fill:#b39c91;}.cls-49{fill:#b39c90;}.cls-50{fill:#a8964f;}.cls-51{fill:#a6a69b;}.cls-52{fill:#a5803e;}.cls-53{fill:#bd9589;}.cls-54{fill:#ab807f;}.cls-55{fill:#aaa398;}.cls-56{fill:#a86161;}.cls-57{fill:#b19d90;}.cls-58{fill:#aebfae;}.cls-59{fill:#b08988;}.cls-60{fill:#ae9f94;}.cls-61{fill:#aea095;}.cls-62{fill:#a4bcae;}.cls-63{fill:#c09387;}.cls-64{fill:#c09186;}.cls-65{fill:#b29d92;}.cls-66{fill:#a7ad91;}.cls-67{fill:#a7ad90;}.cls-68{fill:#abab8b;}.cls-69{fill:#c0ac7f;}.cls-70{fill:#d8817d;}.cls-71{fill:#cb8b80;}.cls-72{fill:#ca8b80;}.cls-73{fill:#d1867c;}.cls-74{fill:#d1757b;}.cls-75{fill:#d1757c;}.cls-76{fill:#d1877c;}.cls-77{fill:#d1877b;}.cls-78{fill:#d07c7c;}.cls-79{fill:#d0837d;}.cls-80{fill:#c88d81;}.cls-81{fill:#c3b480;}.cls-82{fill:#c58f84;}.cls-83{fill:#acb0af;}.cls-84{fill:#acb4b2;}.cls-85{fill:#c6984c;}.cls-86{fill:#dbad3f;}.cls-87{fill:#e39e49;}.cls-88{fill:#dfcb4e;}.cls-89{fill:#d69055;}.cls-90{fill:#a7b9a2;}.cls-91{fill:#a96564;}.cls-92{fill:#a96161;}.cls-93{fill:#a8ad90;}.cls-94{fill:#361d57;}.cls-95{fill:#808065;}.cls-96{fill:#807e52;}.cls-97{fill:#808076;}.cls-98{fill:#808073;}.cls-99{fill:#80805c;}.cls-100{fill:#80805f;}.cls-101{fill:#80806d;}.cls-102{fill:#80806e;}.cls-103{fill:#6e6d58;}.cls-104{fill:#6f674b;}.cls-105{fill:#70623a;}.cls-106{fill:#a2807d;}.cls-107{fill:#71405c;}.cls-108{fill:#a2b5a8;}.cls-109{fill:#a2a89d;}.cls-110{fill:#a2b8ab;}.cls-111{fill:#6e2825;}.cls-112{fill:#9b807c;}.cls-113{fill:#9b757c;}.cls-114{fill:#80807a;}.cls-115{fill:gray;}.cls-116{fill:#807f67;}.cls-117{fill:#807a58;}.cls-118{fill:#808880;}.cls-119{fill:#808180;}.cls-120{fill:#646452;}.cls-121{fill:#595f4c;}.cls-122{fill:#592c29;}.cls-123{fill:#5a5f4c;}.cls-124{fill:#575125;}.cls-125{fill:#838080;}.cls-126{fill:#757662;}.cls-127{fill:#838565;}.cls-128{fill:#460d6b;}

Contact Us, Our team is pleased to help you!

If you have questions about the shipment process, tap on the button below.


Shipment process

Boost your business with the best quality tillandsias, contact us!

Monday-Saturday
9:00 a.m. – 5:00 p.m. (CST)